Accessing The Web Interface
In order to configure the Yealink device to be used along with our service, it is required to access it's web interface settings. For this, the IP address of the device must be acquired.
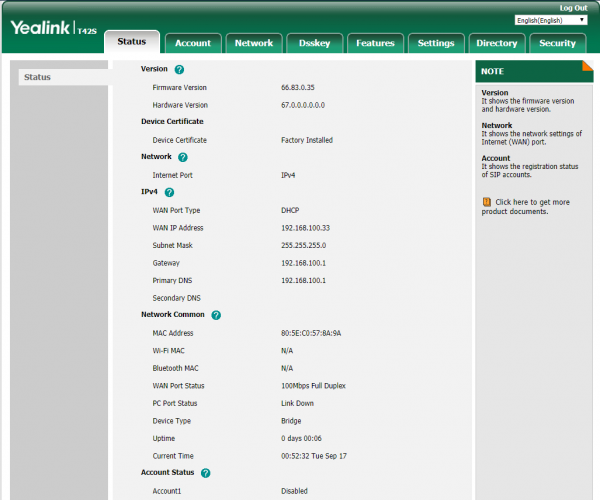
To perform this click on the "Menu" button of the phone. Once on the settings menu, go to: " Status ". On this section, you'll need to take note of the IP address shown beside: " IPv4 ". It should read back something as: " 192.168.0.1 ".
Once you have the IP address please open a web browser of your preference and it's URL bar enter the IP address you got by prepending: "Â http://Â " and access it. Once accessed, you'll be prompted to authenticate. The default credentials are:
Username: admin
Password: admin
Identity Settings
Once logged in you'll be presented with this screen:
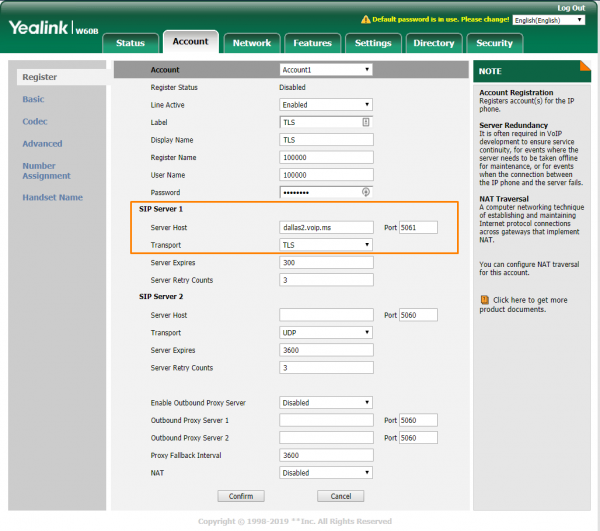
Here, please navigate to:Â Account. Once on this page, please fill these fields as follows:
Account X
-
- Line Active: Enabled
- Label: It configures the label to be displayed on the LCD screen for account X
- Display Name: The name you wish to pass when calling out. (See the requirements below).
- Register Name: ######_subaccount (replace with your SIP main account or subaccount)
- User Name: ######_subaccount (Same as you set the register name)
- Password: Your SIP account's password
IMPORTANT: Outbound CallerID Name
  - We suggest entering your outbound Caller ID Name must be in capital letters. This will appears more clearly/visible on some devices.
  - You must NOT use any special characters, they will not be displayed.
  - Enter a max of 15 characters. Some of regular Canadian providers will not show more than 15 characters max. We suggest shrinking or adapt your caller ID.
  - Spaces are allowed in a caller id name.
SIP Server X
-
- Server Host: One of VoIP.ms multiple servers, you can choose the one closest to your location
- Port: 5060
- Transport : UDP (or TCP depending on your network's settings)
- Server Expires: 300
- Server Retry Counts: 3
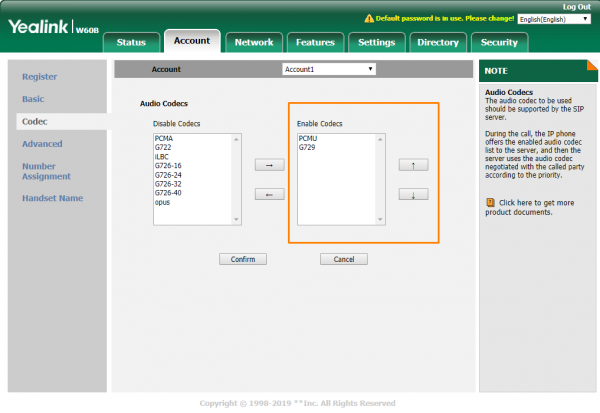
Once done press the: " Confirm " button at the bottom. Then, head to the: " Codec " section on the left column
Codecs
Here, leave enabled only the following ones on the " Enable Codecs " section:
PCMU & G729
Â
Finally, press the: "Confirm" button on the bottom When all these steps are taken & fulfilled the device will be ready for use.
If you experience any issues or find anything you'd like to contribute with please don't hesitate to contact us.
TLS encryption
Important: Notice that this step is NOT mandatory, while it adds a security layer to your communication, you may need to have advanced knownlage to use this.
In order to use these devices with encryption, besides having to enable the SIP account in your VoIP.ms customer portal, there are some aditional settings you will have to modify in your device's configuration.
Transport and port
At the Account X >> SIP Server X, modify the following values:
-
- Server Host: Add the port number designated to TLS (5061, 5081 or 42873). For example:Â dallas2.voip.ms
- Transport: TLS
RTP Encryption
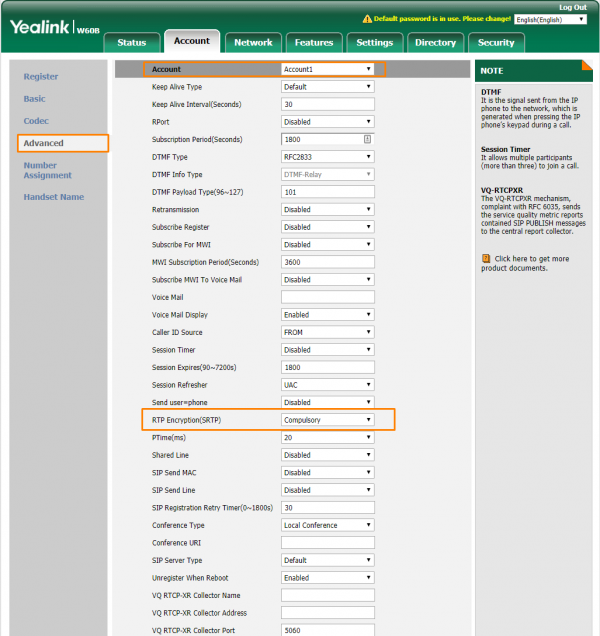
At the Account X >> Advanced, check the following values (Check that you are still changing the proper account):
-
- RTP Encryption(SRTP): Compulsory
Guide Links
In the event where you need the guide directly from Yealink you may find the user/admin manual guide below:
User Manuals : Documents & Firmware


